| Table of Contents |
|---|
Summary
You can create
...
a new group
...
1. Find a parent folder for the group. This should place you on the Browse Groups Hierarchy screen. In this example we're in the Personal Groups folder.
- If you have permissions to create a group in this folder, you will see the "Manage folders" panel at the bottom of the page. If you do not see this panel, contact your administrator.
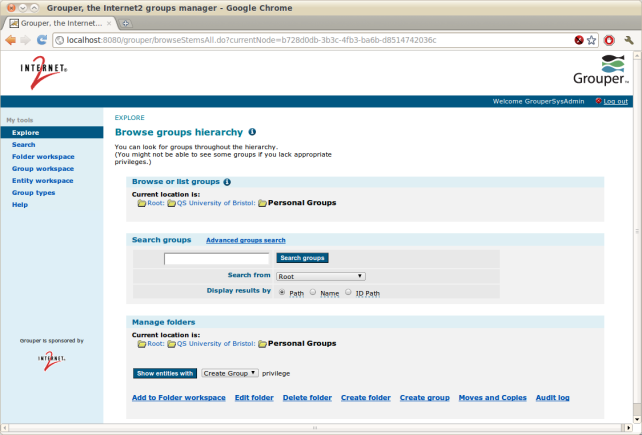
2. Click "Create Group" at the bottom of the "Manage folders" panel. The Create Group screen will appear.
- You can mouse over the field labels to learn more about what to enter in each field
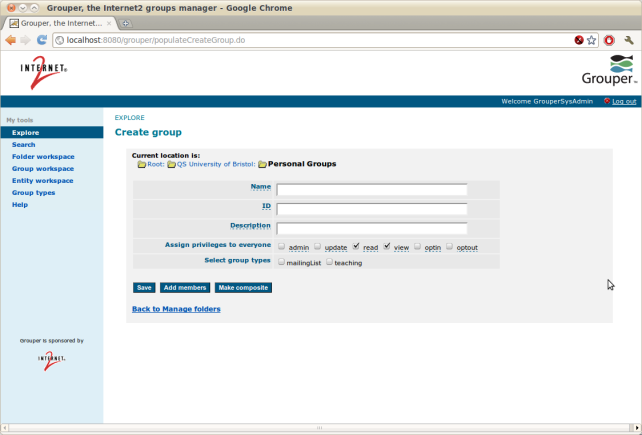
3. Fill the fields in the panel, then click "Save" to create the group.
- If you click the "Add members" button, your new group will be saved and you can add members to the group.

...
within a sub-folder, as long as you have the required permissions to do so.
Privileges requirements
You need CREATE (or ADMIN) privileges in the folder where you want to create a group.
Procedure
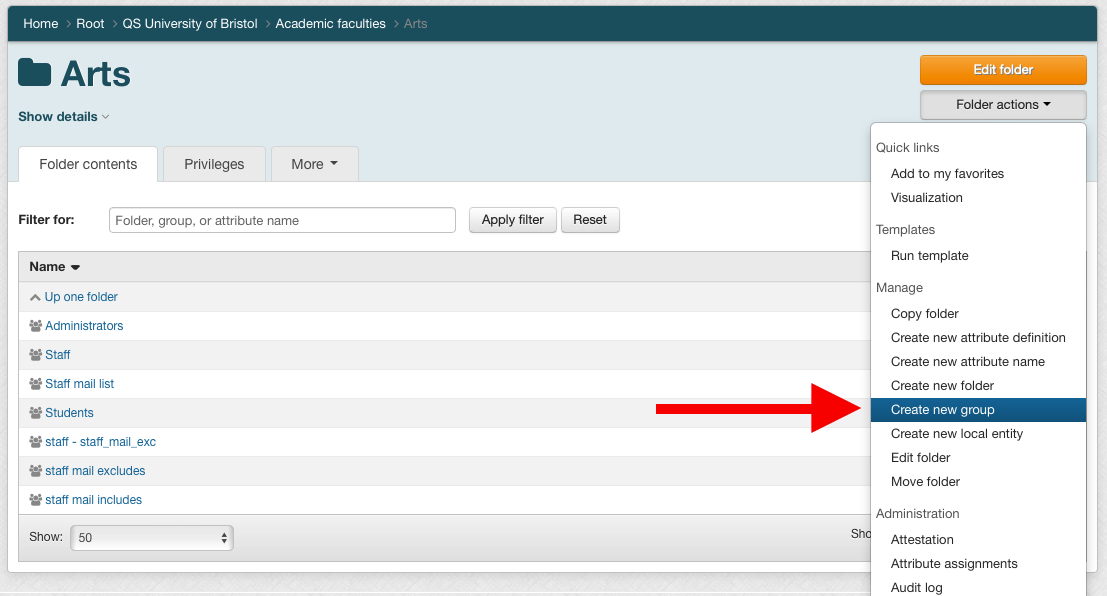
- Find the folder in which you want to create your group, either by navigating using the tree view, or by searching for the folder by name. In this example, we will use the Arts folder under the QS University of Bristol > Academic faculties hierarchy.
- Click the Folder actions menu and then click Create new group.
- Enter the name of your group in the Group name field. The name of the group must be unique within the folder, but does not need to be unique across all of Grouper. Click the Save button.
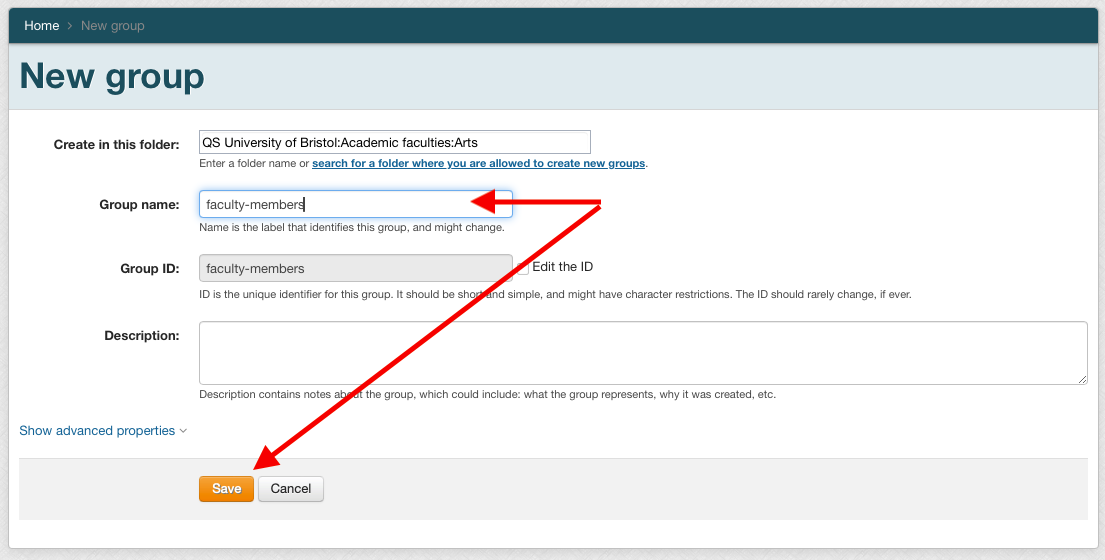
- If the group was created, you will be taken to the group membership page. See Add a member (entity or group) to a group to learn how to add members to your new group.
